
Tuesday, 31 December 2013
Mother's Days : Chromakey Tests 3, 4 & 5
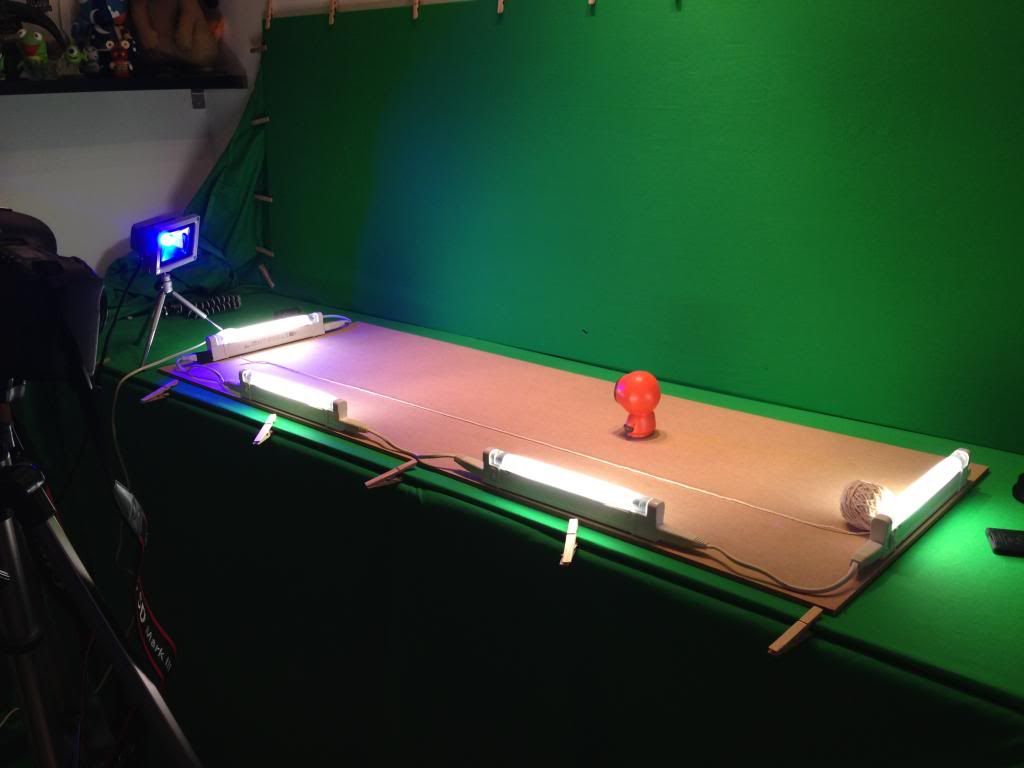
Chromakey : Test 03
In my previous tests I used green underneath the character. For these tests I wanted to go back to my original plan of putting a floor underneath the character and the green screen as a background rather than a full surround.
Clip 01.
Test 03 didn't turn out so great because there was really bad, distracting flickering all the way through. I thought this was because I had used some small florescent tubes that were previously from my home-made light box, so I removed these from the equation and continued to test 04.
Chromakey : Test 04
Clip 02.
Clip 03.
After removing the florescent tubes I thought the flicker issue would be resolved. However, it was still flickering. I wasn't sure what it could be so I tested each light individually and they were all still flickering in the live view on Dragonframe. I went back to the internet in search of answers. I came across one suggestion of using a low ISO. My two previous attempts had been with high ISO numbers so I gave it a go.
Chromakey : Test 05
Clip 04.
Clip 05.
Test 05 was by far more successful than the previous two. There is still some flicker in the footage but I have come to the conclusion that the lower ISO solved the main problem, and it is the result of my location and the dips in the electricity that have always caused lights in my house to get brighter and dimmer depending on what the electricity decides to do. This is something I can't fix so it will probably have to become part of the style of the 'hand-crafted-ness' of my animation. The next issue will be making the CG Background comply with slight flickers so they blend rather than clash.
Sunday, 22 December 2013
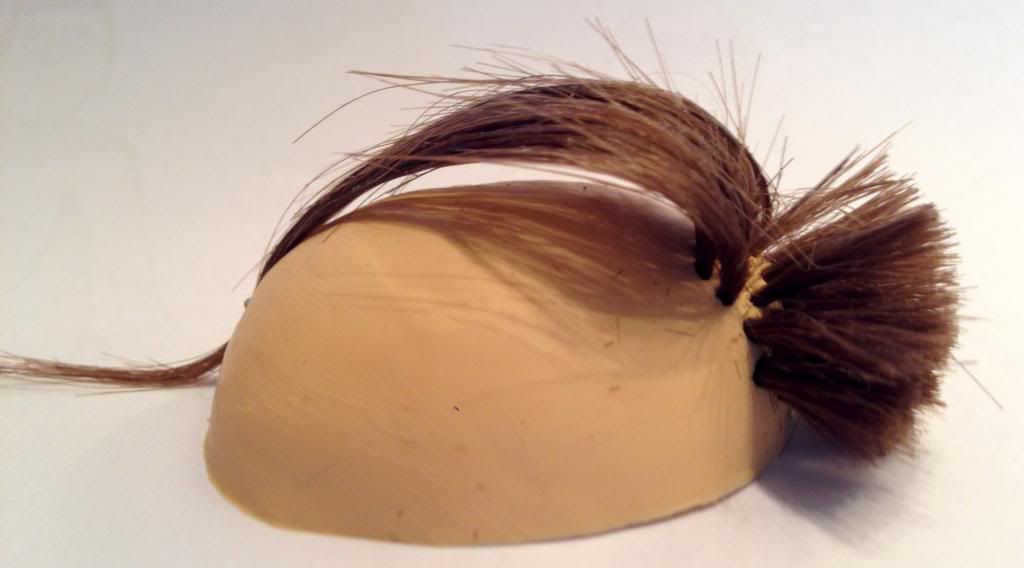
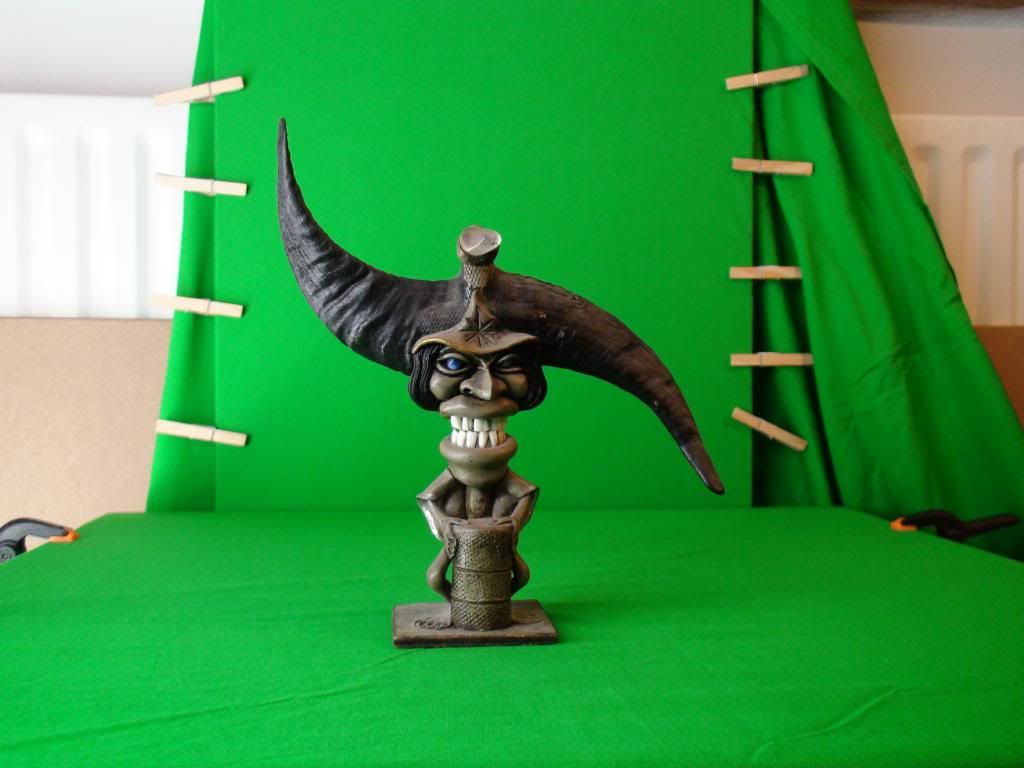
Mother's Days' : Mould Making Test
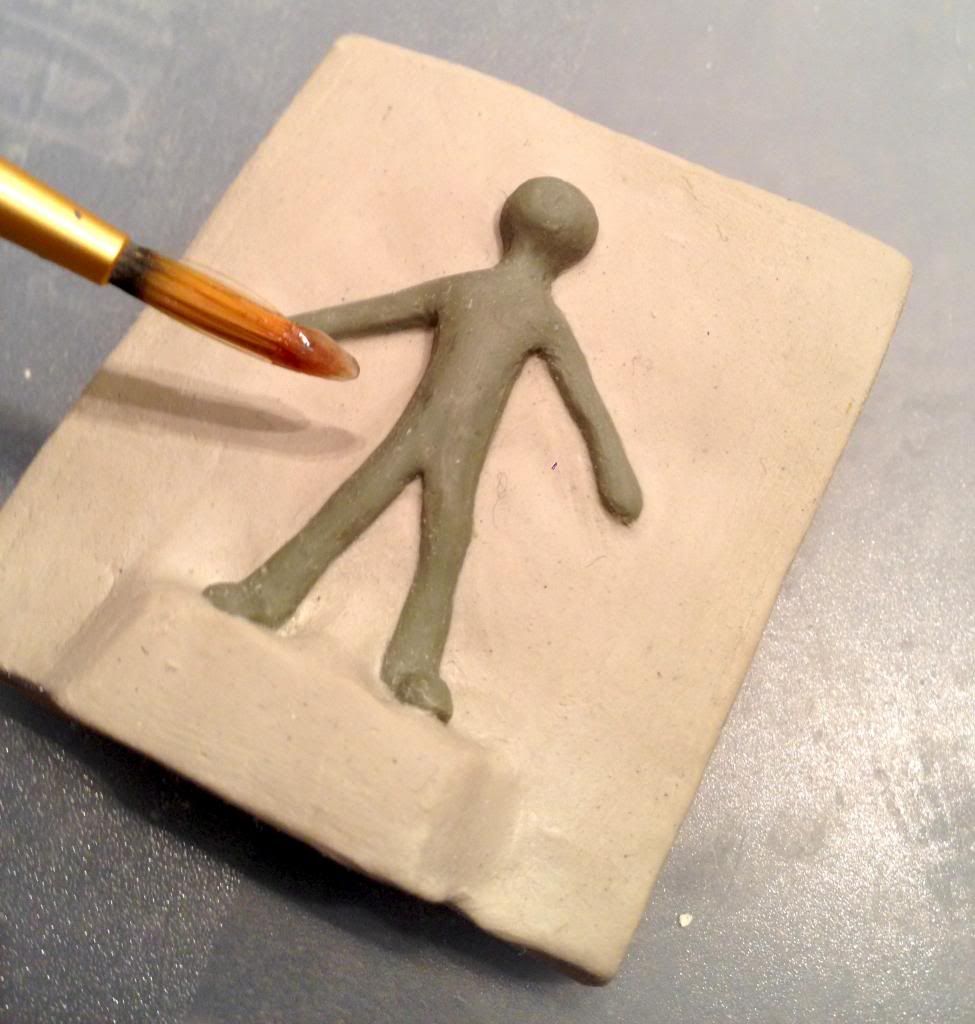
To learn how to use materials for puppet making, I dived into it with this little test guy.
Tuesday, 17 December 2013


Monday, 16 December 2013
Mother's Days' : Son's Modelling Progress
In this post I'll be showing some images of modelling the son with Chavant Clay.
First of all I wrapped my puppet's armature in plumber's tape. I'd decided to sculpt over the armature so I could make sure the armature would definitely fit inside the the model, I wanted to protect the metal from getting clogged up with clay, and so I came up with the idea of wrapping it in plumbers tape as it's nice and flexible and wraps tight to the surface.
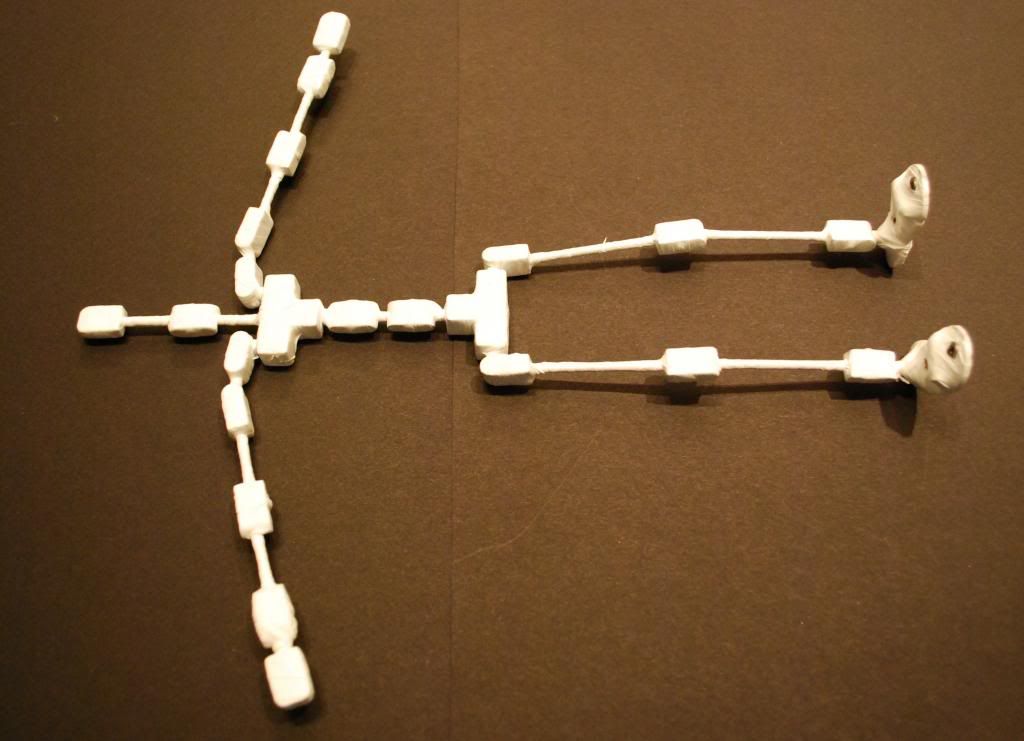
Figure 01.
After wrapping the armature up, I padded it with an initial layer of Chavant Clay. This clay was used because it's sulphur-free and won't cause a chemical issue with the silicone that I plan to make the puppet from.
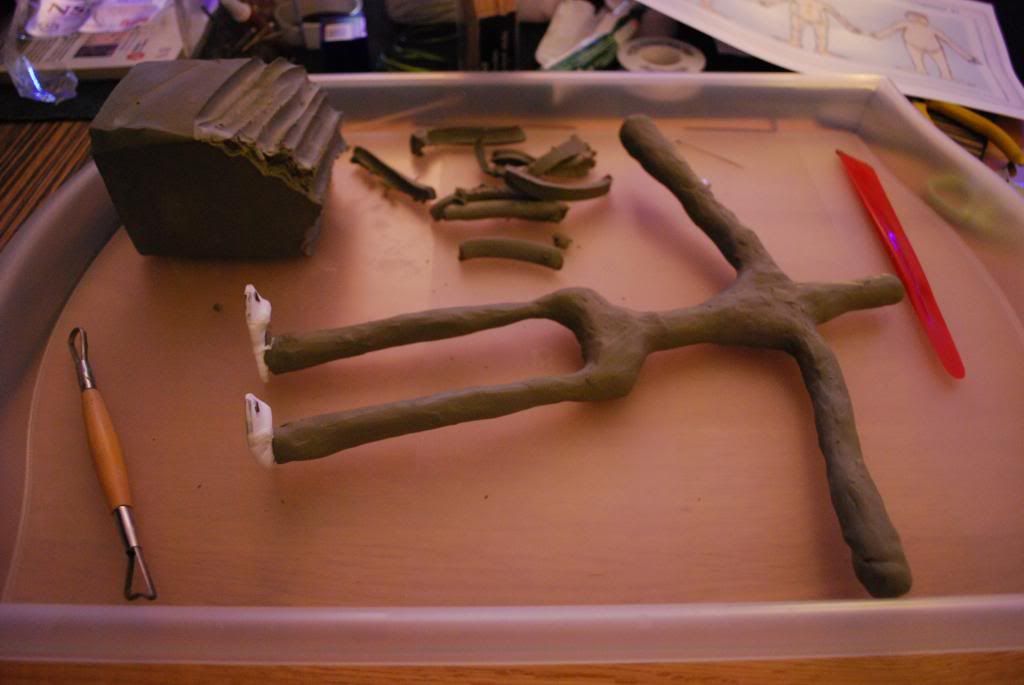
Figure 02.
Placing some pieces of clay onto a piece of foil, then onto a hot water bottle works great for warming the clay and making it readily pliable whilst building up the sculpt.
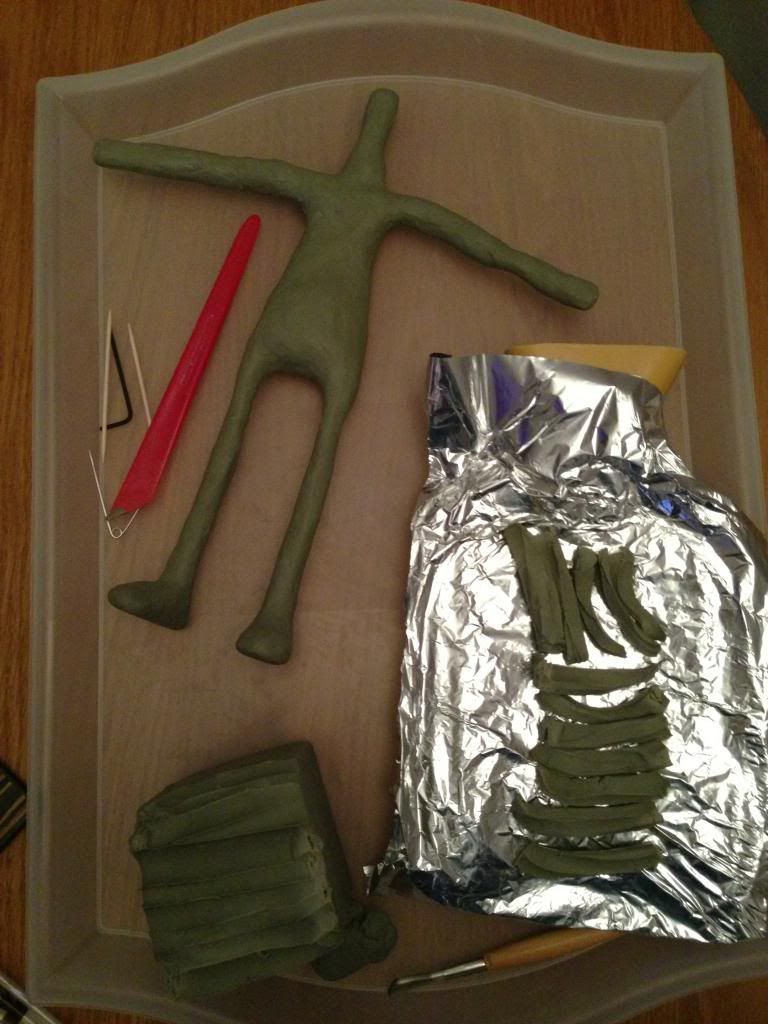
Figure 03.
I built up the clay into the basic form of the character. Then I tried adding the hands, I don't normally like three fingers on a character, but I tried it on this one. I still didn't like the three fingers on him so I changed it again to 4 fingers, 1 thumb. At this stage I was still waiting for the eyeballs to arrive so I put some temporary sockets in to see how it might look.
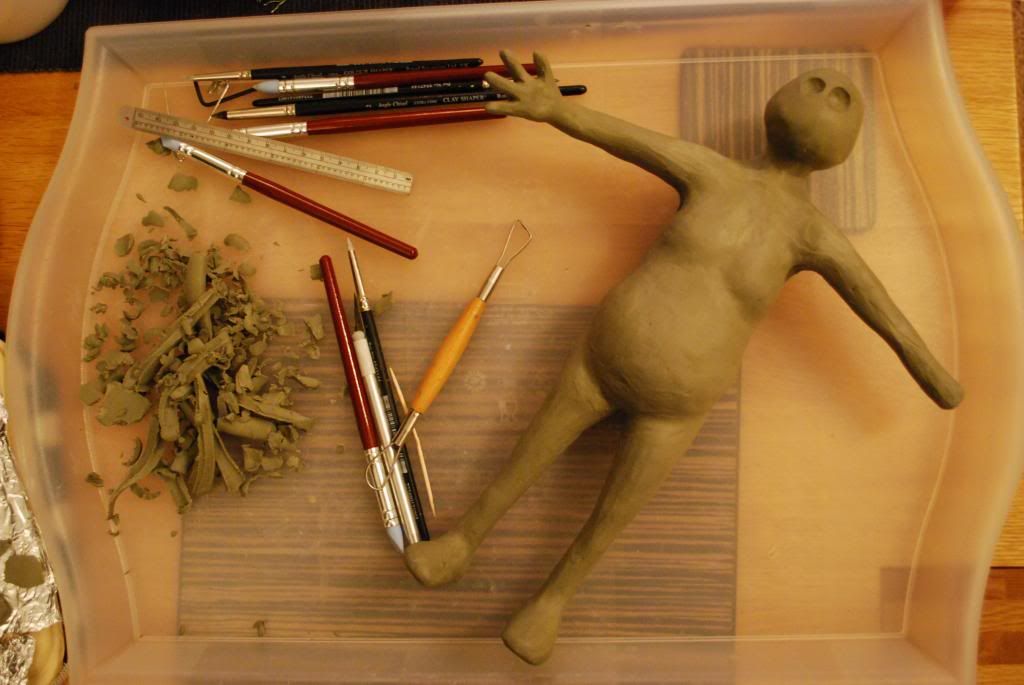
Figure 04.
I sculpted in some heavy, male anatomy on the character, this shows the initial stages.
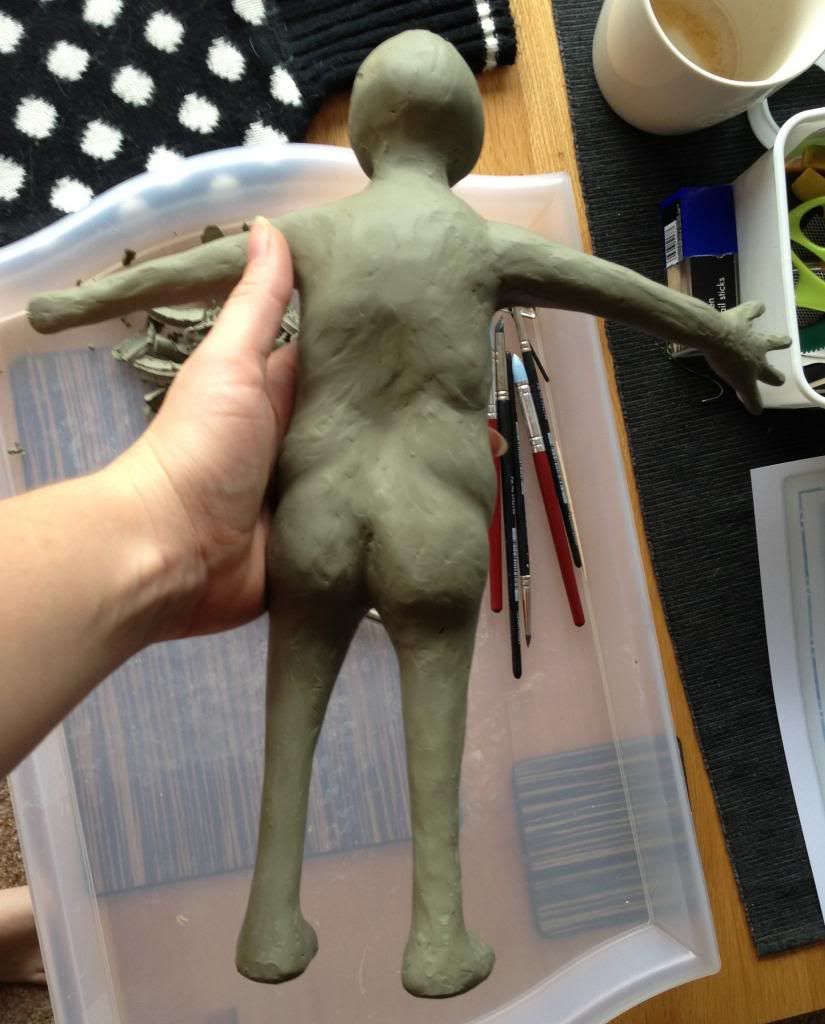
Figure 05.
When the eyeballs arrived I tried out a few different sizes to see which ones worked best with my character. There was a selection of 8mm, 10mm, 12mm and 14mm eyeballs made of high density Delrin Plastic, I found that the 14mm worked best with my character. I scooped out some clay in the face, popped in the eyeballs and sculpted back into the face creating the eyebrow bone, a nose, and the start of a mouth.
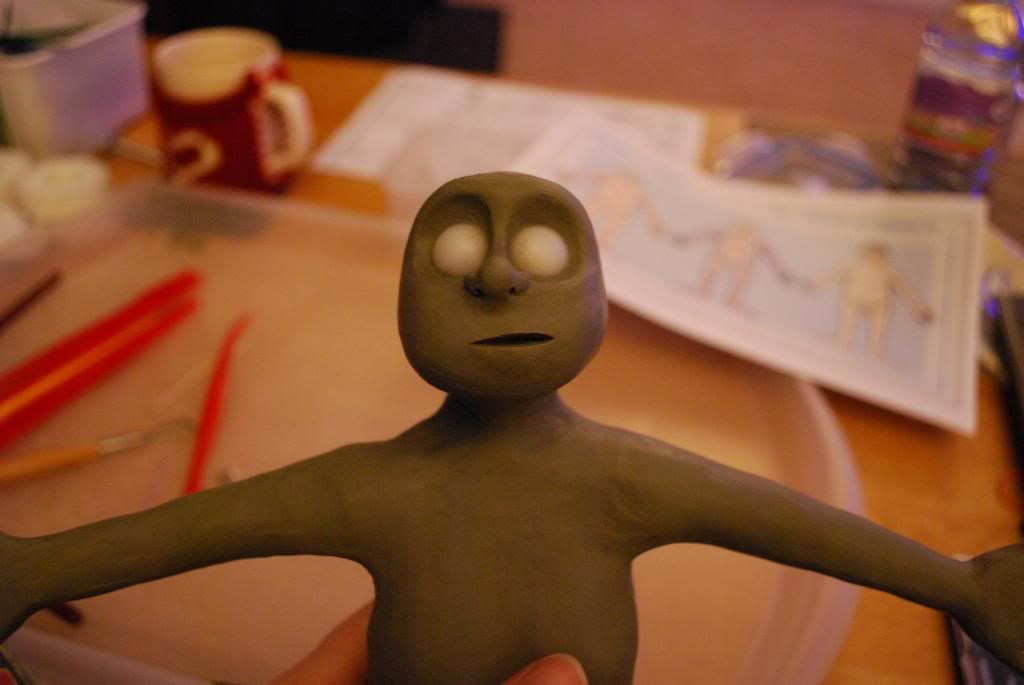
Figure 06.
Here I just made some quick temporary eye lids and pupils to see the kind of size I'd need to make for the real ones. The eyes will be drilled into with a very small drill so a pin can be used to move them during animation, also I'll paint some black pupils over the pin hole. The final versions will be a lot smoother and thinner so they look like they belong to the eyes better, rather than just stuck on.
You can also see the kind of size of the puppet against the size of my hand.

Figure 07.
As this is the first time I've made a puppet there are bound to be mistakes. One being detachable arms and head. The reason being, these components will contain wire parts to the armature, the hands and the facial ares that move (mouth). I'm separating the whole arm as there will be a summer scene in the animation where the character will be wearing a t-shirt so the arms need to be visible without gaps where hands attach. The mistake I mention is where I sculpted the whole character, then had to dissect him to find joints and then repair the separate elements.

Figure 08.
I've used a straw so there is enough of a gap, when it comes to joining the silicone parts together, for the chunky parts of the armature to get to the sockets inside.

Figure 09.
I drew some sketches to figure out where to dislocate the shoulder as there were a couple of complications with this area, some of the armature parts were glued together so they couldn't be the parts that separate.

Figure 10.
Here is an image of a temporary stand-in shoulder and arm joint (taken from my second puppet's armature) so I could keep track of where the joints and block-out areas would be.
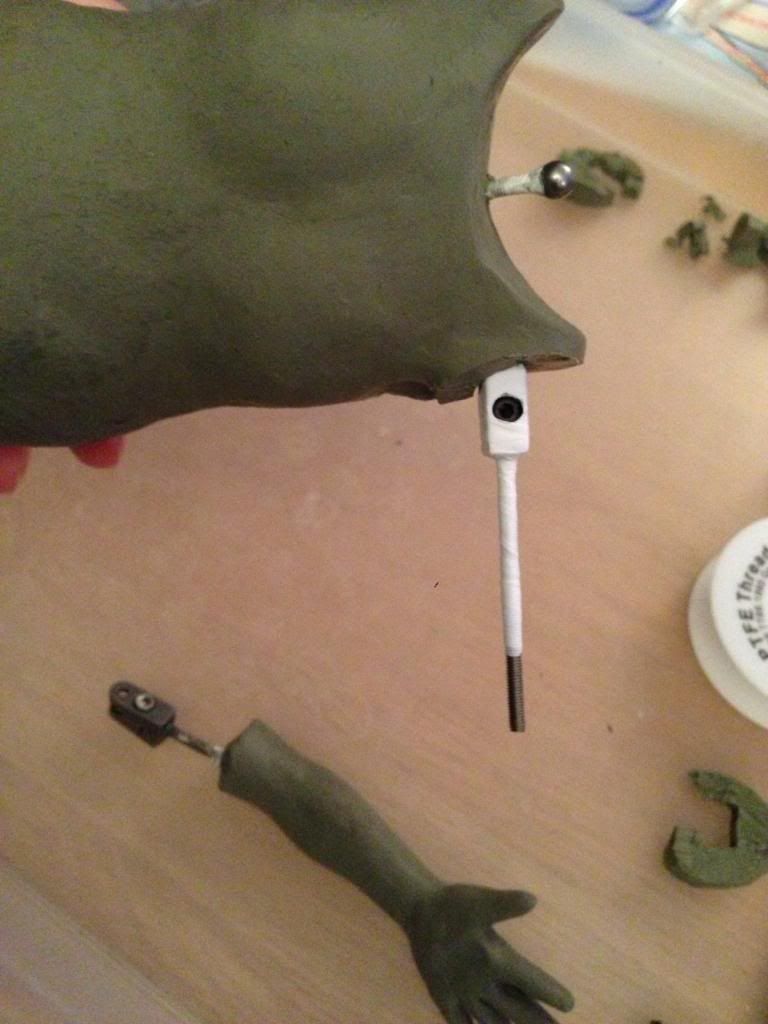
Figure 11.
I then put a piece of clay at the other end of the armature piece and a large straw around the whole joint to indicate where there would be a gap in the silicone so the detachable arm could slot back up into the joint.
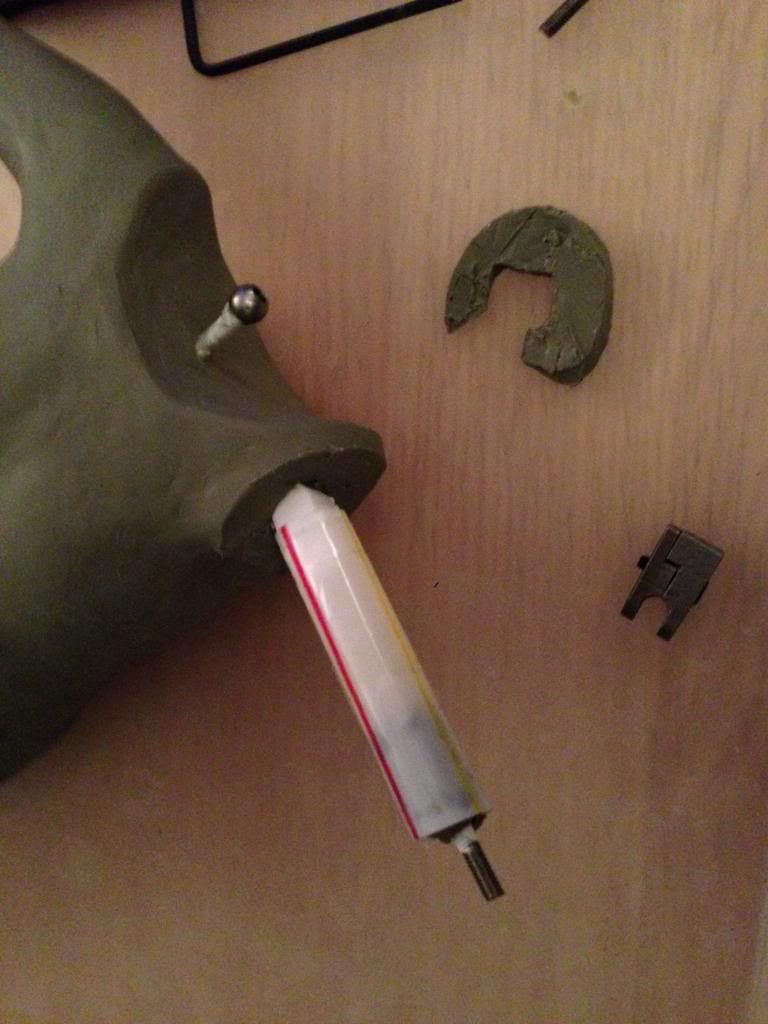
Figure 12.
Figure 13. shows how I had to take a lice from the character's shoulder to locate the joints to unscrew them for this process.
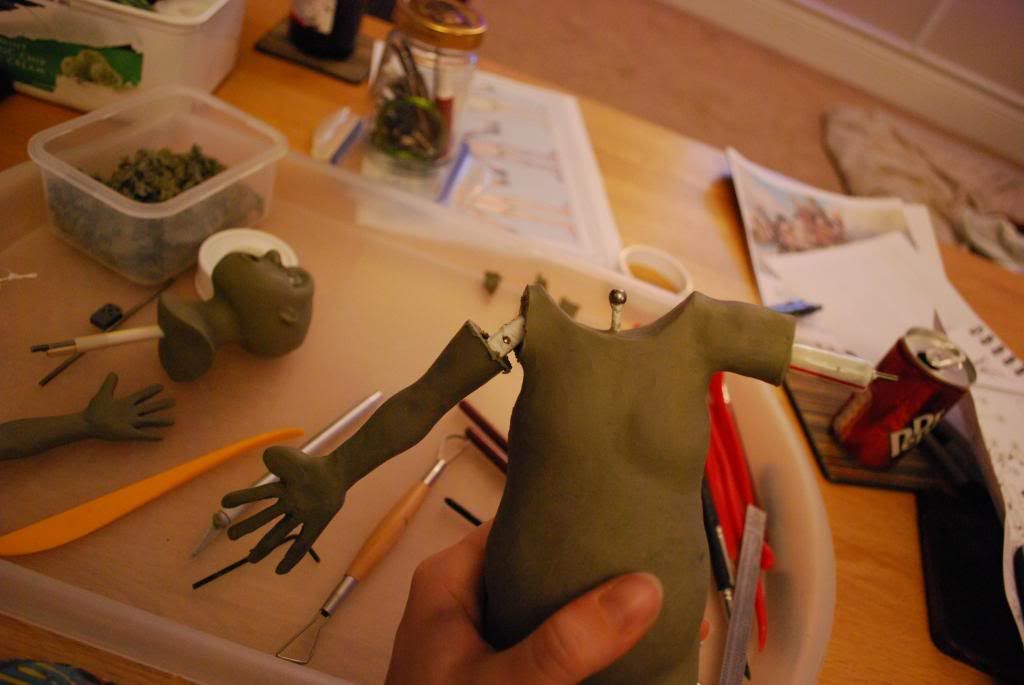
Figure 13.
Then re-sculpted the seperate pieces to resemble their former shape ready for the next phase.

Figure 14.
Below shows all of the pieces ready for the next step. The body, head and arms will now be finalised in shape, then smoothed ready for casting. The stand-in eyelids and pupils will be removed and final versions will be cast separately with different amounts of closure for blinks.
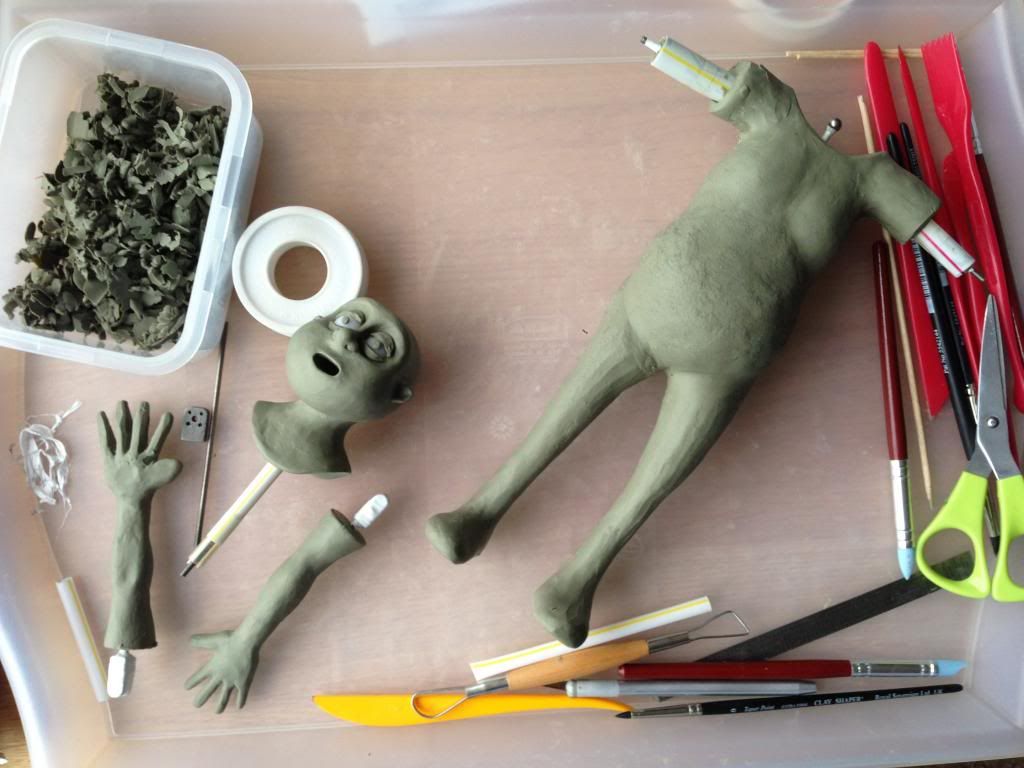
Figure 15.
Tuesday, 3 December 2013
Mother's Days : Chromakey : Test 02
These are a couple of clips that show tests with chromakey using stop motion animation.
Both failed miserably which is good, because I know some of the limitations of green screen and the amount of care with lighting that is needed to fix these issues.
Clip 01. Test 01
In clip 01 I only had certain lighting availability, these were; 1 florescent tube, a row of down-lighters above in the ceiling, and an energy saving lamp. I also used a piece of cardboard covered in some frog-tape (green masking tape) as a wedge to place under Cartman's foot as he is a chunk of foam and wanted to make it look like he was walking. I wanted to test if this tape was any good as green screen tape. As is evident in some sections of the footage the tape is slightly too reflective and was difficult to remove in the chromakey process as it would show as yellow from the lights and not remove. Another problem here is the shadowing caused from the positioning of the lights. The shadows below are too dark and would not remove in the after processes, also where the light was not very vibrant the levels of black and white balance in 'Keylight' had to be at such a high number that they started to dissolve part of Cartman's figure.
In clip 01 I only had certain lighting availability, these were; 1 florescent tube, a row of down-lighters above in the ceiling, and an energy saving lamp. I also used a piece of cardboard covered in some frog-tape (green masking tape) as a wedge to place under Cartman's foot as he is a chunk of foam and wanted to make it look like he was walking. I wanted to test if this tape was any good as green screen tape. As is evident in some sections of the footage the tape is slightly too reflective and was difficult to remove in the chromakey process as it would show as yellow from the lights and not remove. Another problem here is the shadowing caused from the positioning of the lights. The shadows below are too dark and would not remove in the after processes, also where the light was not very vibrant the levels of black and white balance in 'Keylight' had to be at such a high number that they started to dissolve part of Cartman's figure.
Clip 02. Test 02
Test 02 was a variation on test 01 with a slightly different lighting rig, this meant removing the light source from above to deplete the harsh shadows below Cartman, plus a wider cardboard wedge to try and hide the problem in clip 01 where the shadows would have a rectangle chunk missing from the shadow, the idea behind the wider wedge was to try and remove the shadow underneath completely. There was also some light facing the green screen to try and give a more even coverage of green. As shown in the clip though, the problem is now the shadow that has been cast by the wedge itself.
I didn't continue to blend these characters into the background in post, as valuable time would have been wasted, it was evident that the problem was residing in the earlier stages so they are the areas that need fixing.
Monday, 11 November 2013
Mother's Days : Chromakey : Test 01
Chromakey ;
(Communication Arts / Broadcasting) (in colour television) a special effect in which a coloured background can be eliminated and a different background substituted Also called colour separation overlay
As there will be a lot of green screen use in this animation, I'll need to do a variety of tests to get the best results. Here is test one. I found it really interesting, and not overly hard using this method.

Figure 01. Close view of the green screen setup

Figure 02. Lights in the setup

While I was taking pictures, I moved the object around on the area and found it to be true that the objects are better further away from the green screen as there were less shadow issues.
Clip one shows the visuals through each stage of my process, clip two shows the same thing but with added text at each phase.
Clip 01.
Clip 02.
I like the results for a first attempt at using a green screen.
The next thing to work out is how to apply some kind of shadowing, and to test this method on footage rather than a still image.

Friday, 8 November 2013
Mother's Days : Armature to Life - Making Of
Here is the 'making of' footage for the Armature to Life animation in my last post,
this is 14 hours of footage of me moving all the individual pieces of armature sped up 200,000 times the speed to play in 23 seconds.
Tuesday, 5 November 2013
Mother's Days : Armature to Life
Over the course of approximately 37 hours across one weekend I made my first piece of stop motion animation. Equipment was borrowed so I had the time restrain of friday night until monday morning until the equipment had to be returned. I really wanted to make this as a kind of DVD Extra, and I had to do it at this stage of the project as any further in the armature would be inside my silicon puppet.


Figure 01.
The studio needed blacking out so the windows wouldn't affect my lighting set-up
Figure 02.
I started filming part way through my process, the video will be edited into a time lapse clip and uploaded into my next post.
Figure 03.
I love how the onion skinning looked whilst making this.
Figure 04.
Figure 05.
Figure 06.
Figure 07.
Figure 08.
Tuesday, 29 October 2013

Sunday, 27 October 2013
Mother's Days : Son's Anatomy Development : 01

These postcards show my creative process when trying to design the character's body shape around the armature. I find it important to always have a layer of muscle anatomy underneath any design so it's more believable.
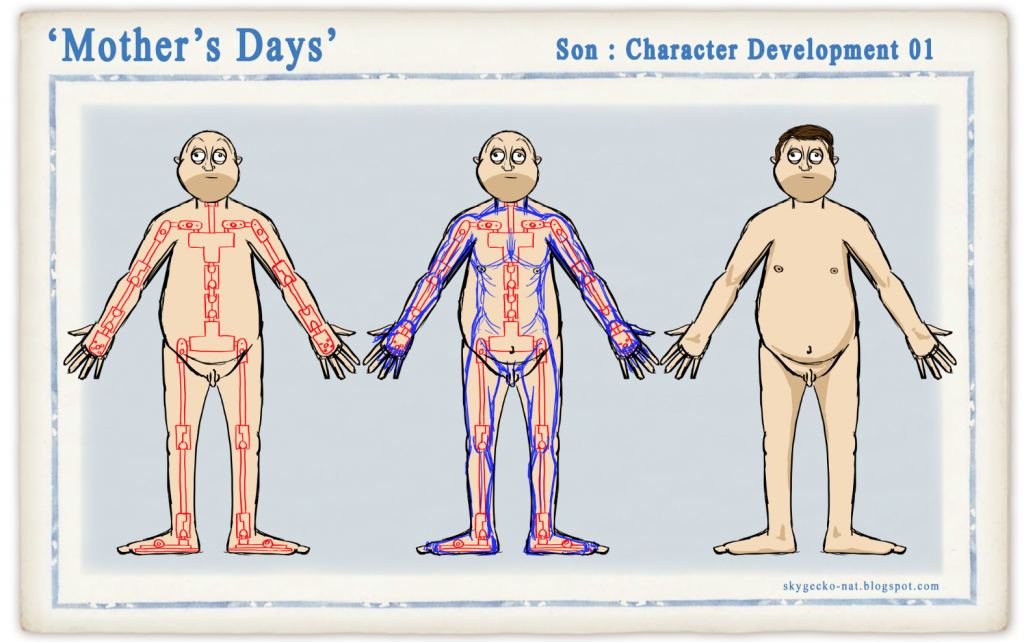
Mother's Days : Son Character Development : Insides
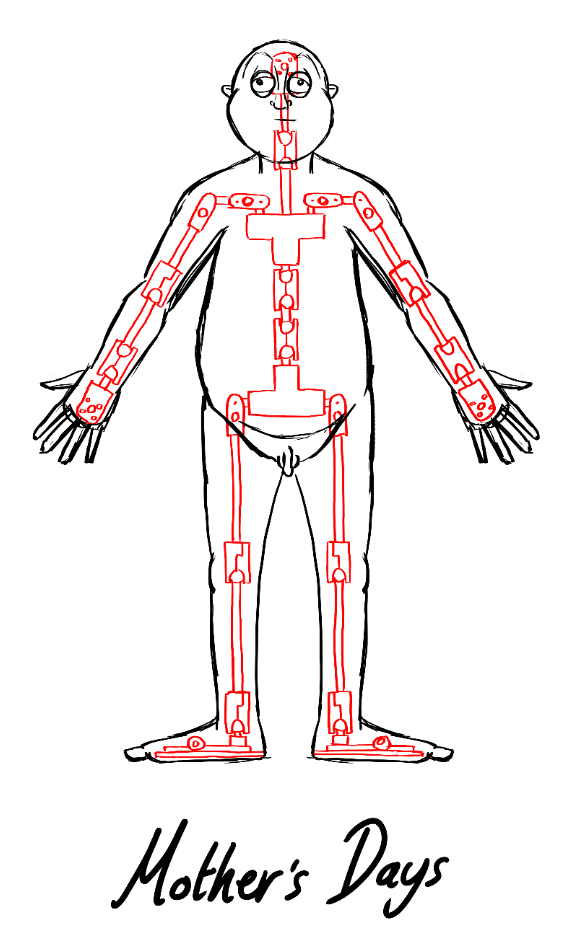
Here's the first test for designing the body over the armature to make sure things will fit early on during the development process.
Saturday, 26 October 2013
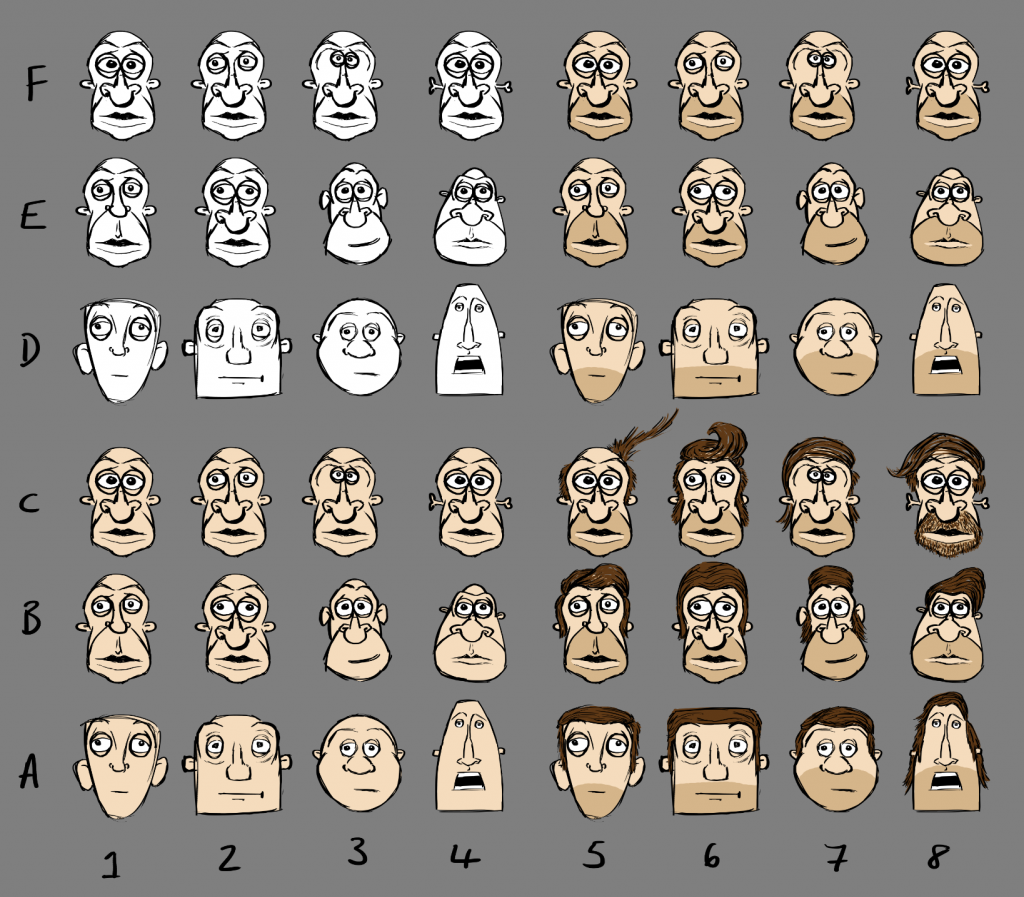
Mother's Days : Son Character Designs : 01
Here are some character head designs for the son, my favourites are A5 & A7
Wednesday, 23 October 2013
Mother's Days : Storyboard : Draft 01, Page 01
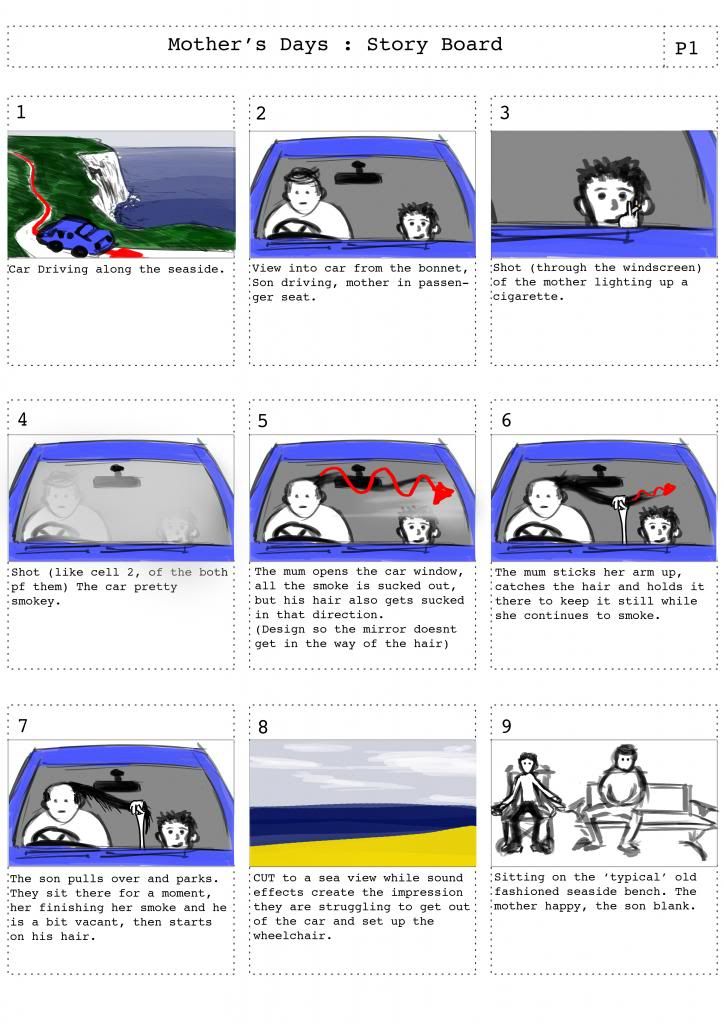
Here's a draft of storyboarding page 01, this is to simply get some visual story telling on the go.
Wednesday, 16 October 2013
Final Year Project : Mother's Days : Final Script
After all of the suggestions, I've decided to make this the script I will work from. Things will probably be tweaked as I go along, but I think this will be the one for me.
Sunday, 13 October 2013
Final Year Project : Script Draft 09.
I like option 02, it kind of gives hope that things might start looking up, a little bit of luck
Friday, 11 October 2013
Thursday, 10 October 2013
Sunday, 29 September 2013
Final Year Project : Script Draft 03
I finished draft 03 of the script after my tutorial on friday, and now I'm really thinking there's something missing from this story. I've been having feedback from a few different voices and now I've noticed there's not so much 'me' in my story. So I will post this version up and get to work on the next draft where I shall try and inject some of my own thoughts back in.
Friday, 27 September 2013
Final Year Project : First Character Sketches
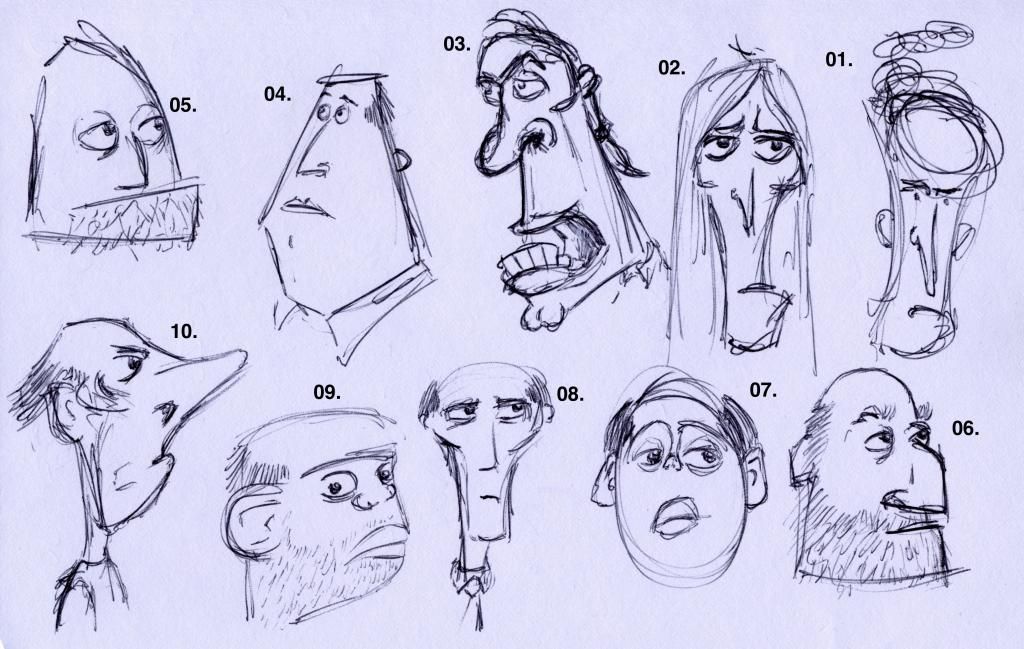
Figure 01.
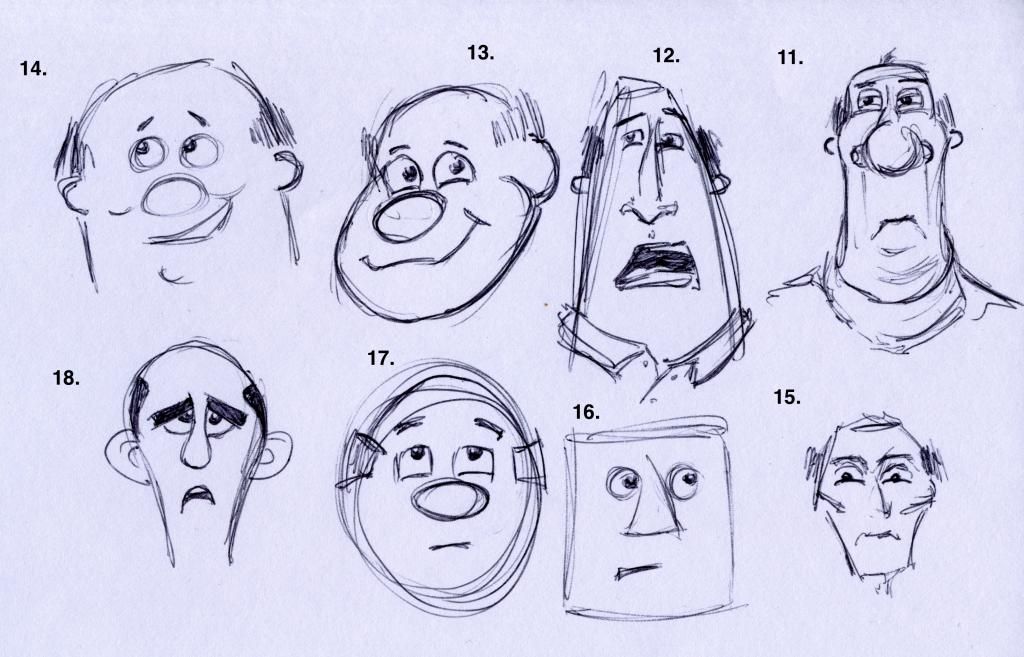
Figure 02.

Figure 03.
Figure 04.
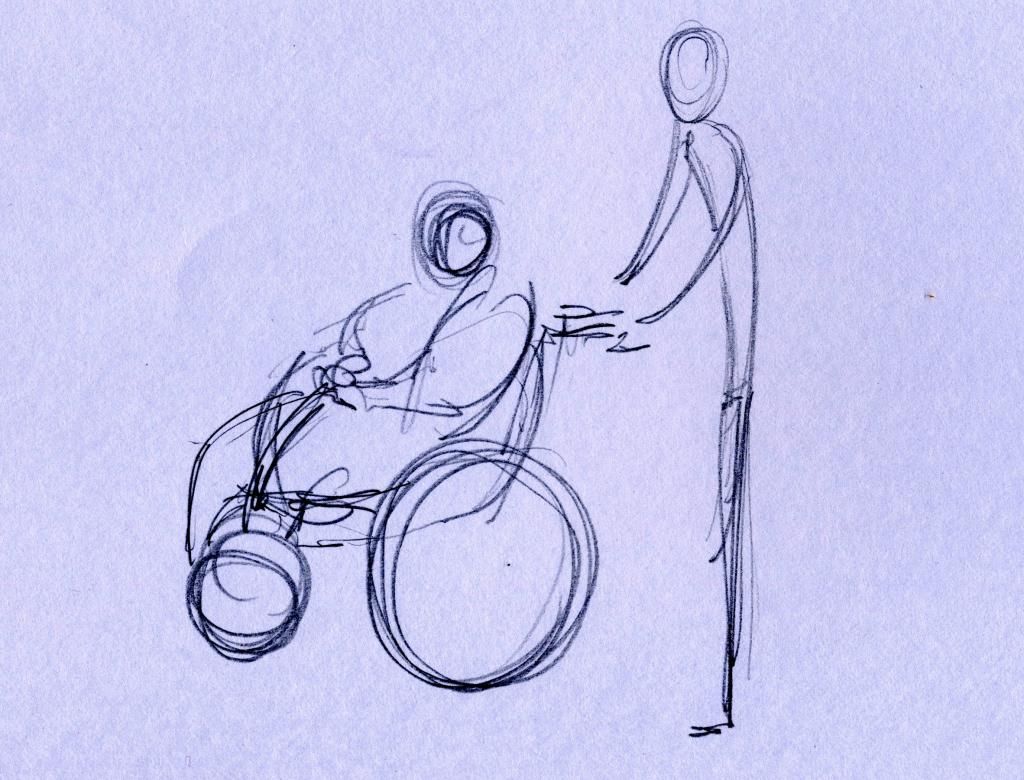
Figure 05.
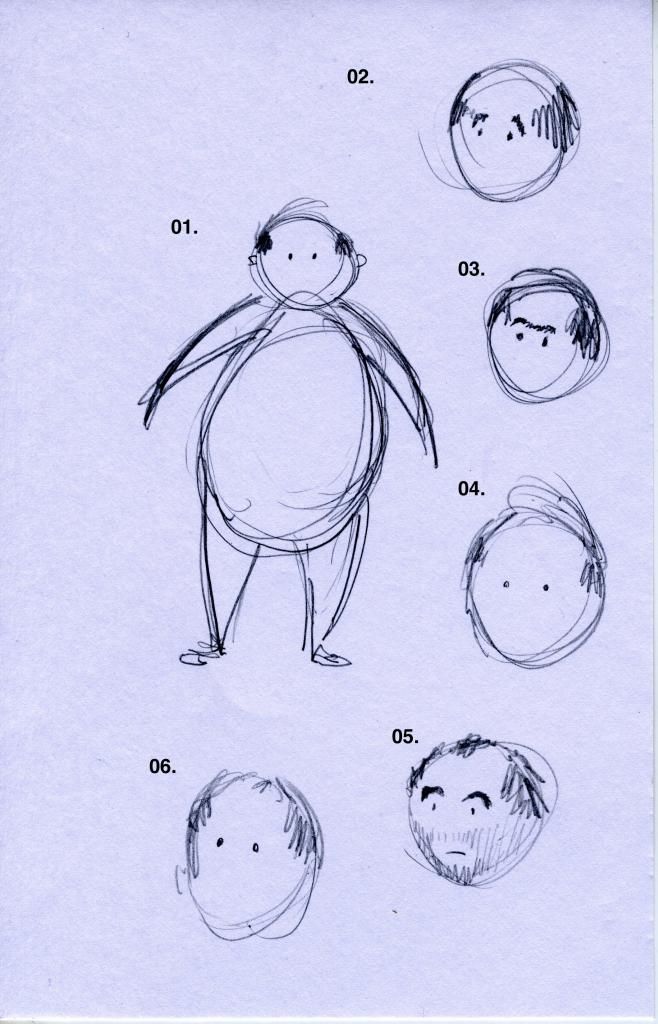
Figure 06.
Here I've been sketching out some character designs but none of them scream out yet. There's another factor to incorporate in my character designs now after watching the extras on Paranorman where the lead puppet maker explains that thinner character puppets are a lot more flexible to animate with, as a lot of rounded flesh is quite difficult to manoeuvre. This was a good little nugget of advice so I shall use it.
Thursday, 26 September 2013
Wednesday, 25 September 2013
Final Year Project : Idea / Script Draft 02
I spoke to Phil about the script, and the story changed a bit. It is now a bit more heart-wrenching than funny. This is quite a different take on my original plan but I do quite like the thought of working on a project that touches peoples emotions a bit deeper too.
Final Year Project : Introduction
The beginning of my third and final year as a CG Arts & Animation student.
I've been thinking of ideas over the summer that I could make an animation with.
After thinking up several ideas, I knew none of them were THE idea....
.....until I went for a walk on the beach one day in the rain and saw an elderly couple wrapped up in warm clothes and blankets, sitting on camping chairs in the sand, with wind-breaks and umbrellas up pouring a cup of tea from a flask with great smiles on their faces enjoying themselves.
THIS is BRITISH I thought to myself. So from there I wanted to make a comedic short, nice and British for my final project.

Subscribe to:
Posts (Atom)