As part of the project submission it is necessary to make a short demo reel to suit the area of my chosen career path from current and previous work.

Tuesday, 6 May 2014

Mother's Days : CG House Composite : Test 01

Image 01. Composite Render of the CG Buildings & Stop-motion foreground
(Bump Maps still to be applied)

Image 02. Concept art for comparison

Image 03. House render with dirt now included

Image 04. House render with dirt now included

Image 05. House render with dirt now included

Image 06. House texture map with dirt now included

Image 07. A screen-shot of the maya view - lining the houses up behind the characters with the amusements building and wall temporarily turned off.
Monday, 5 May 2014
Mother's Days : CG Composite : Amusement Building : Test 01

Image 01.
Image 02.

Image 03.
These images are a test to see how the 'Amusements building' works when composited into the scene, this is without all of the tweaking that will be done such as added bump maps, colour correction and lens blur. Image 01 is the composite with the CG Wall and CG Amusements building composited with the Stop-motion characters using After Effects. Image 02 shows the comparison between the production view and the concept view. And Image 03 is how the elements look in Maya through the camera resolution gate with the stop-motion segment as an image plane for line-up purposes.
Sunday, 4 May 2014
Mother's Days : CG : Amusements Building

Image 01. The orthographic diagram, Maya model and texture map

Image 02. A render to see how the texture looks

Image 03. A render to see how the texture looks
The letting will be attached soon, as will a bump map and lighting tests
Friday, 2 May 2014
Mother's Days : August Segment Test

Image 01. Me on set whilst animating Mother's Days
Clip 01. The segments of the August scene. A little rough still but more work is yet to be done for the 'post-clean-up & composite'. Also the background buildings and sound will be added.
Sunday, 27 April 2014
Mother's Days' : Technical Document
This is my technical document to accompany my short animation 'Mother's Days'.
This document explains how I created and composited the CG smoke and burning embers, of a character's cigarette, into my stop-motion animation footage. This document is a requirement for grading.
(Since uploading this document to Scribd, the images have become jagged, they do not have this problem in the original PDF.)
The following clips accompany this documentation.
Clip 01. How the footage looks with the elements composited together.
Clip 02. The original footage - starting point.
Clip 03. The Computer Generated smoke rendered on it's own.
Clip 04. The burning embers rendered on their own.
Saturday, 26 April 2014
Mother's Days : CG Wall
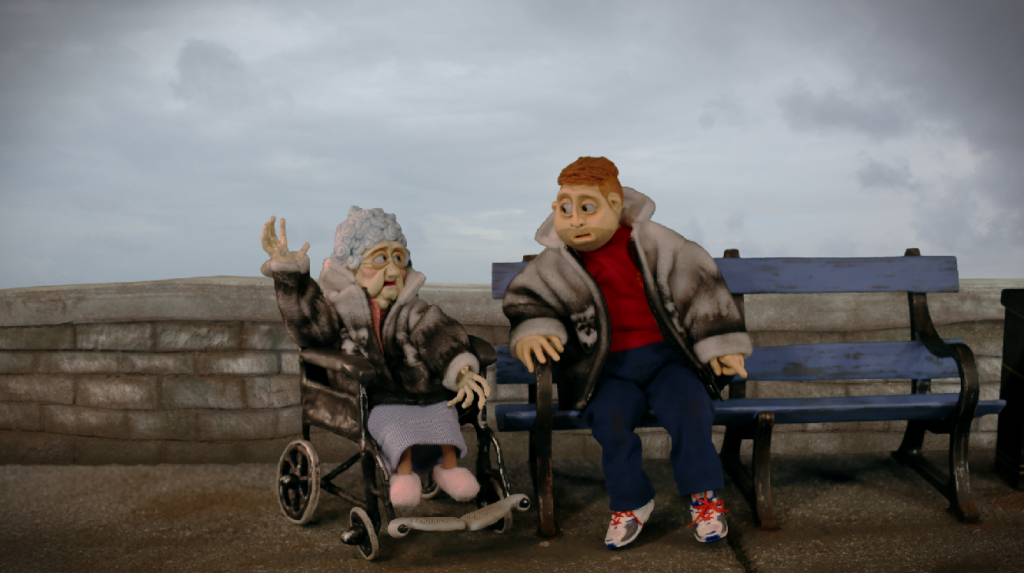
Figure 01. Rough Composite with the wall and a grey sky.
This post is a breakdown of the stages I went through to create the wall in figure 01. There is still more work to be done to blend the components so that they work together smoothly but this is how they look at the moment. There is also a grey sky in the background as a temporary .
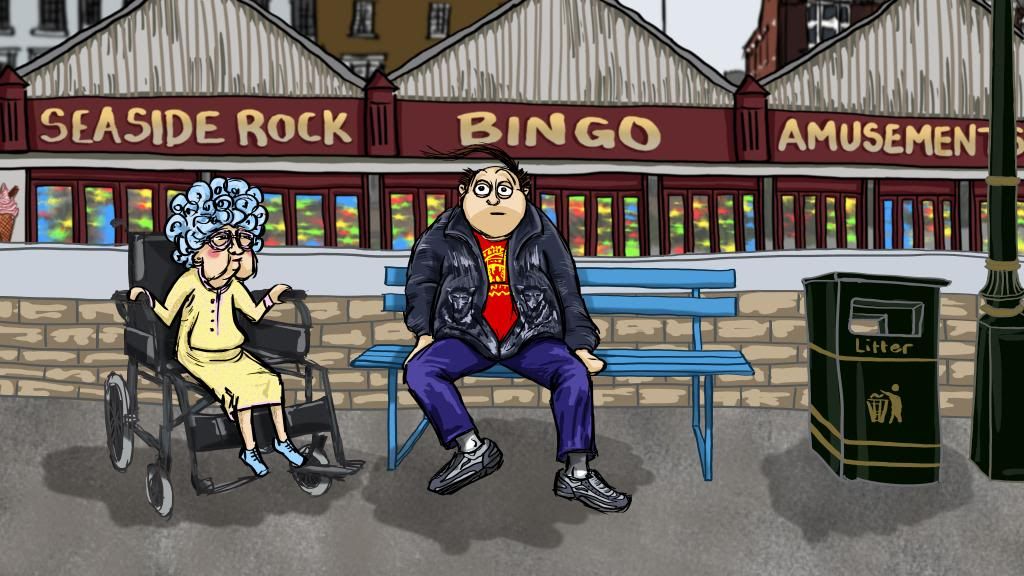
This post is a breakdown of the stages I went through to create the wall in figure 01. There is still more work to be done to blend the components so that they work together smoothly but this is how they look at the moment. There is also a grey sky in the background as a temporary .
Figure 02. Concept Art
I've included the concept art to show how the comparison between concept and how the production is coming along.
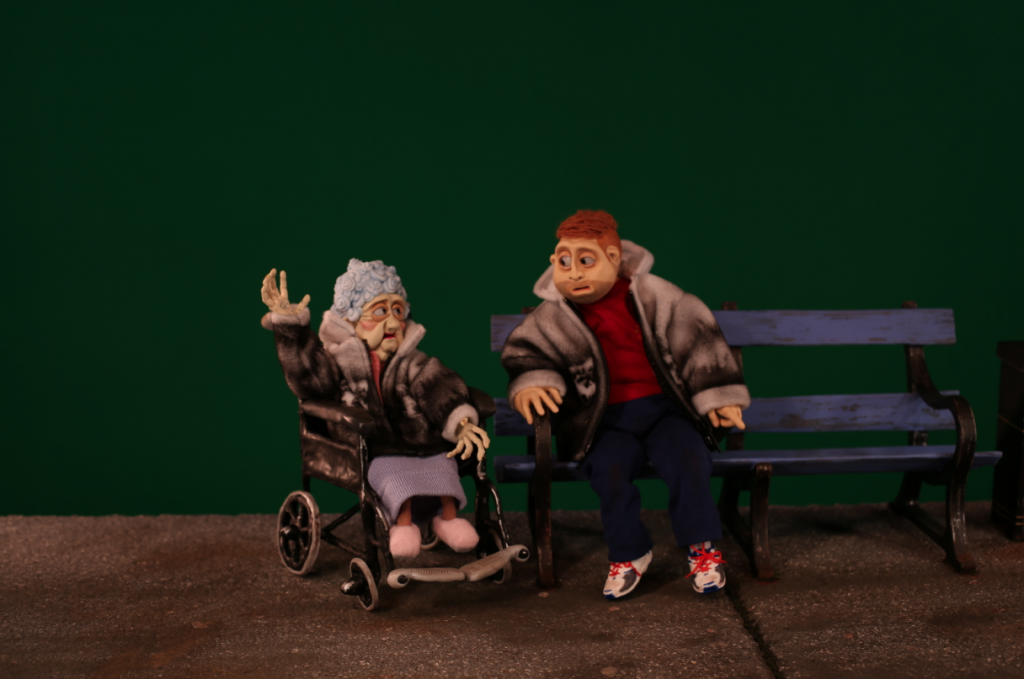
Figure 03. Original frame from the animation.
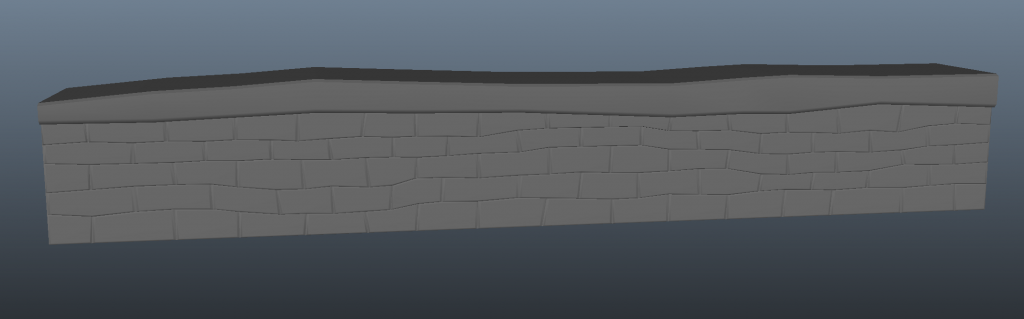
Figure 04. Wall built from a polygon primitive cube in Maya.
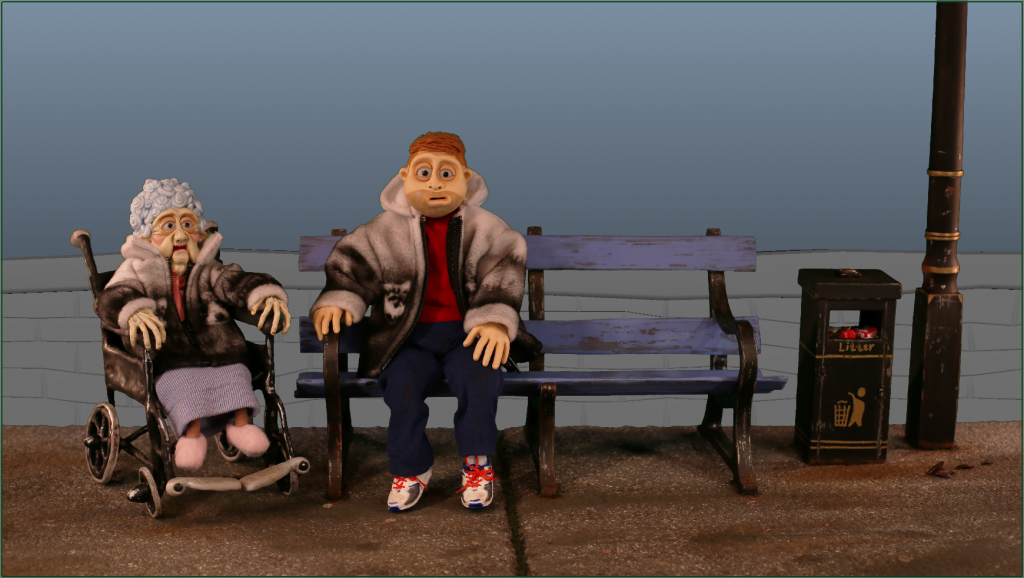
Figure 05. png image plane with the wall to test scale.
I used a still from the animation with the green screen removed as an image plane so that I could make sure the wall looked right with the scene.
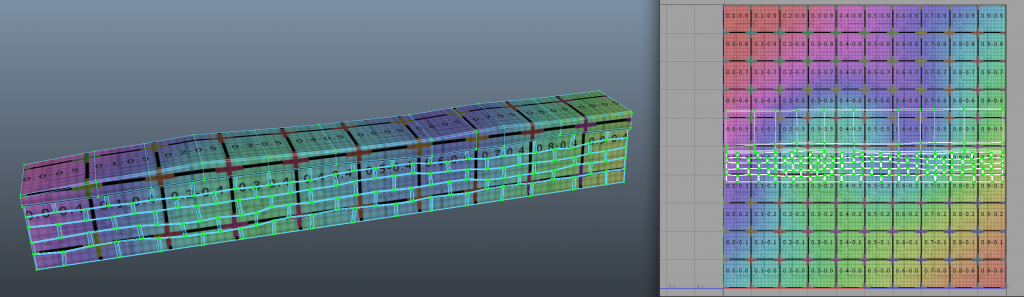
Figure 06. UV's mapped out ready for texturing.
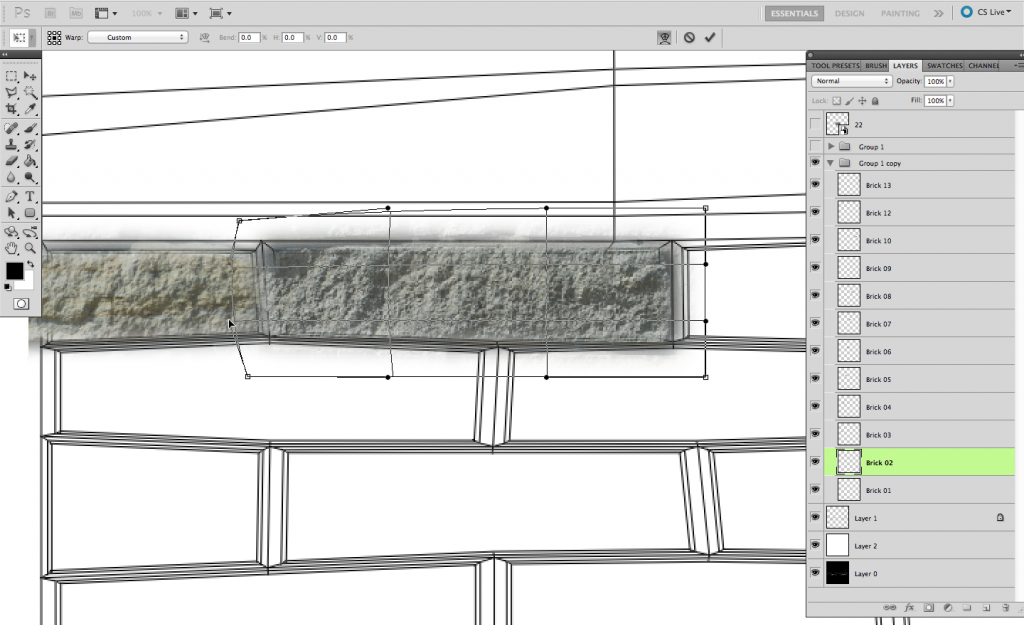
Figure 07. Laying the bricks.
For the texturing, I decided to do all of the bricks individually. This is because of the style I had chosen where the bricks are odd shapes and sizes, a normal high resolution wall texture photograph would not suit the proportions of odd shapes. I added the texture to each brick, layered in the cement between them and added a stone texture for the top section of the wall.
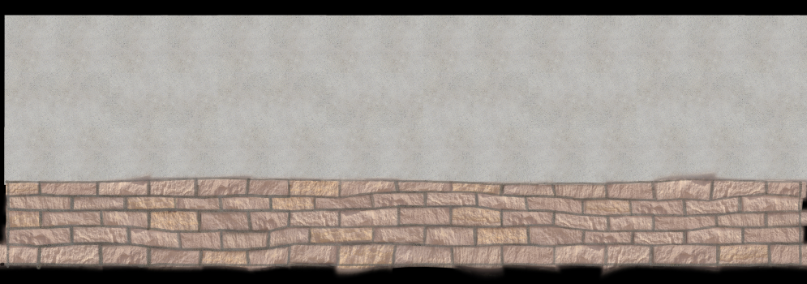
Figure 08. Initial Texture.
This is how the first texture turned out. Of course all realistic textures need some kind of dirt and grime, but first, I make a plain one to test it in the scene and learn where the grime and dirt would accumulate.
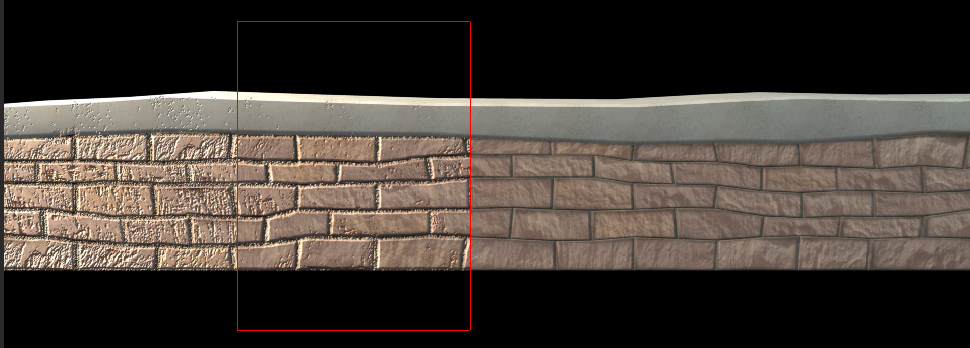
Figure 09. Trying out bump maps.
Here are a few different rendered sections to try out bump maps. I ended up changing the lighting from area to ambient and the bump map worked a lot more subtly, just how I was trying to make it.
Figure 10. Final Bump Map - yes there is something there :)

Figure 11. Attaching the ambient occlusion node to the texture .

Figure 12. Wall with initial texture rendered out.
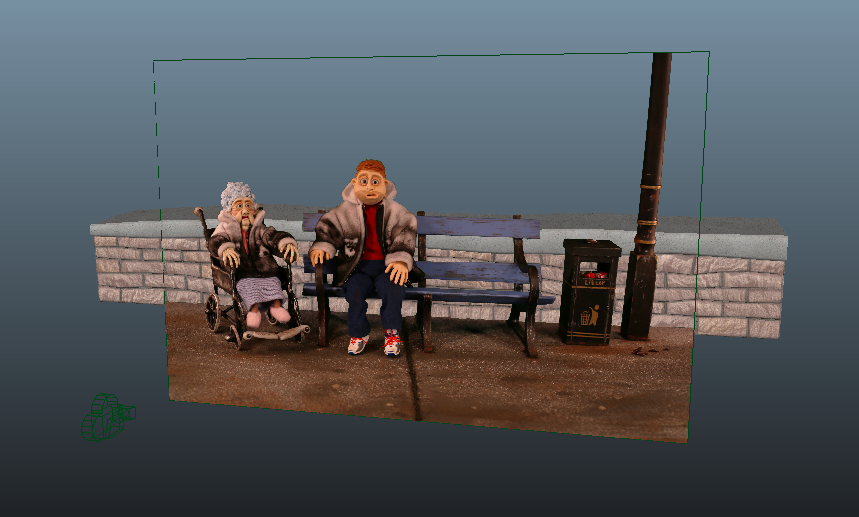
Figure 13. Showing the wall behind the characters with the 'clean wall' texture.
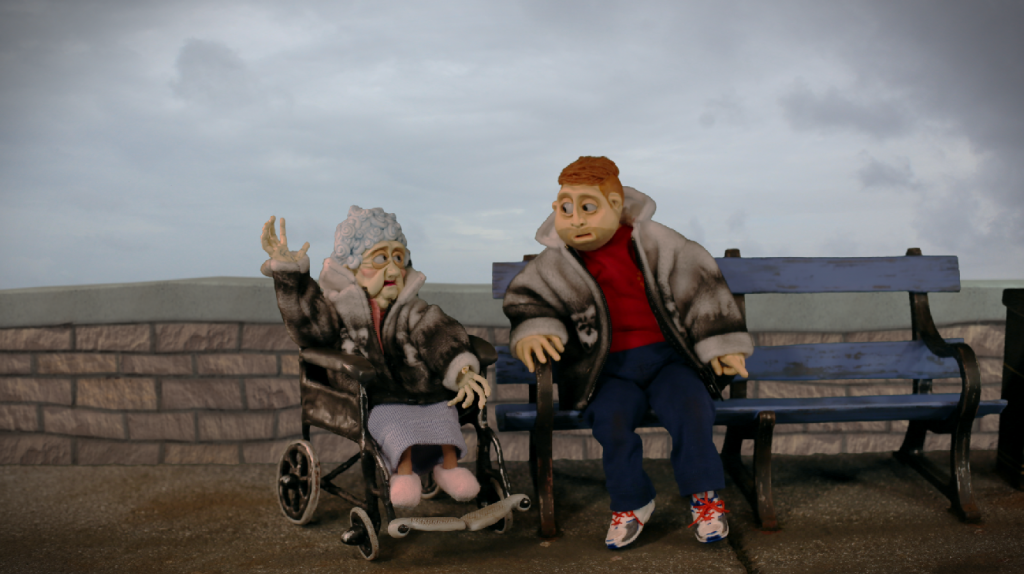
Figure 14. Testing the first render out with the characters and a temporary sky to fill the background.
As you can see, they don't blend very well together, so this is where the fun bit comes in....
Adding grime!
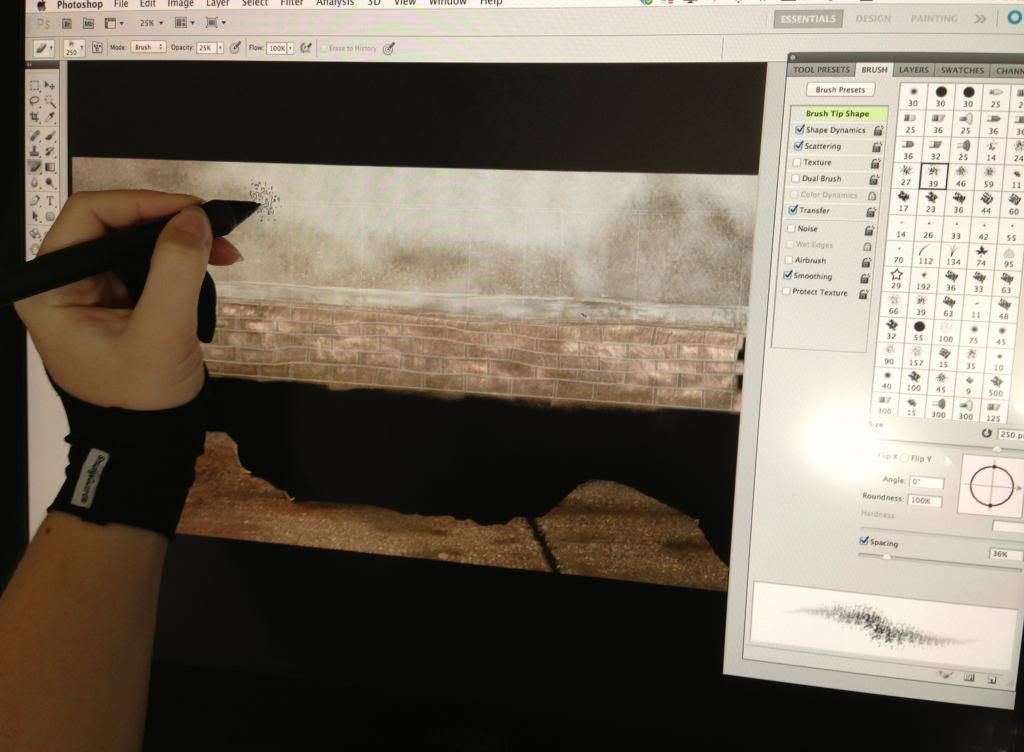
Figure 15. Painting in the grime in Photoshop.
To make sure the colours and textures work together, I took a cutting of the ground from the original frame and using the clone tool with a scatter, transfer and shape dynamic brush, painted on the grime in a few different layers, masks and shades.
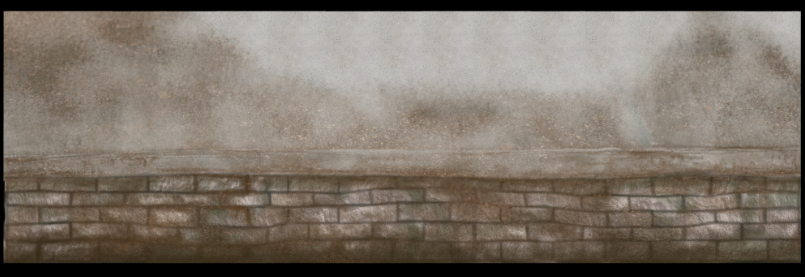
Figure 16. Final Wall Texture.

Figure 17. Final Wall Front Render.
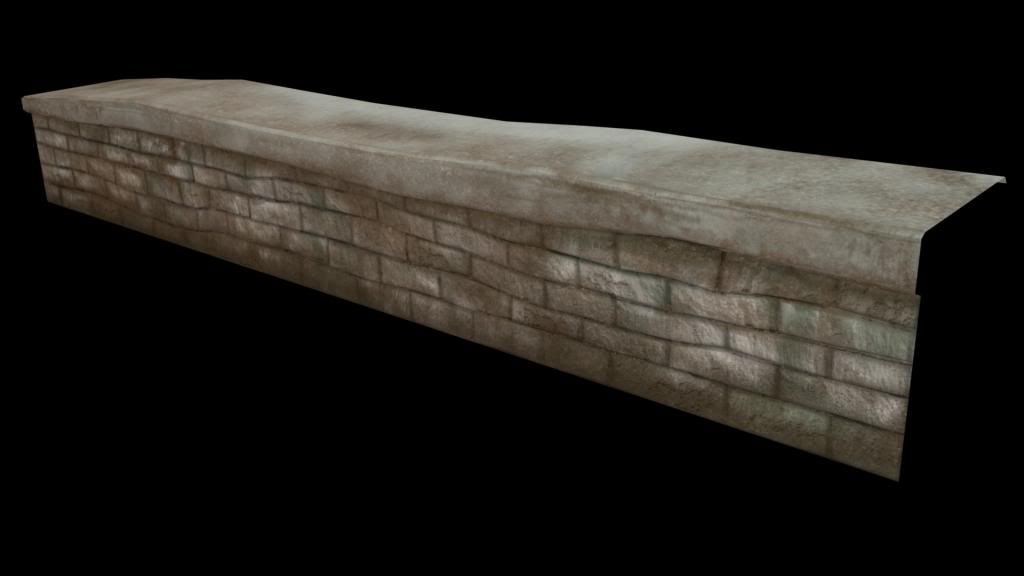
Figure 18. Final Wall Side Render.

Figure 19. Final Wall Lower Render.
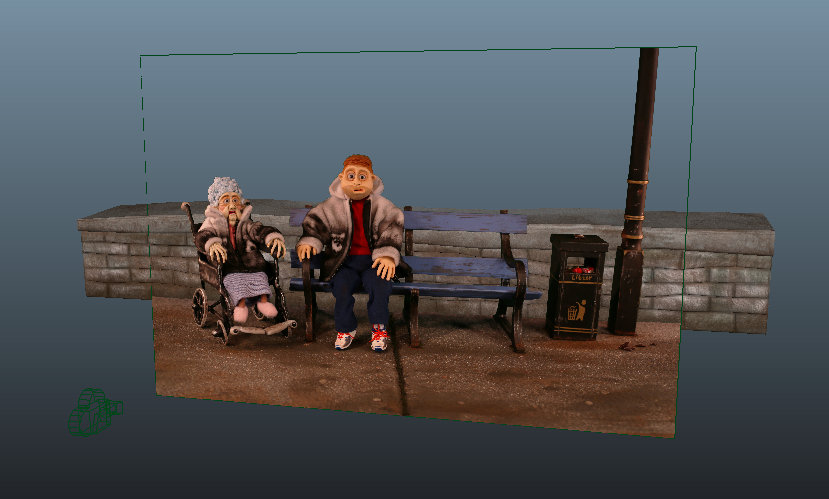
Figure 20. Wall with grime behind the characters in Maya.
Figure 21. Rough Composite with the wall and a grey sky.
By using the samples from the floor section, it made the two sections blend together better.
There are still more things to incorporate into the scene such as the background buildings, more shadow on the wall behind the bench and some moss where the wall and floor meet as well as other tweaking with the look of the film such as a bit of film grain, but for now, this is how it is looking.
Saturday, 19 April 2014
Mother's Days : Hand-made Props : His 'n' Her's Wolf Jackets
Mother & Son are 'Rockin' these matching wolf jackets
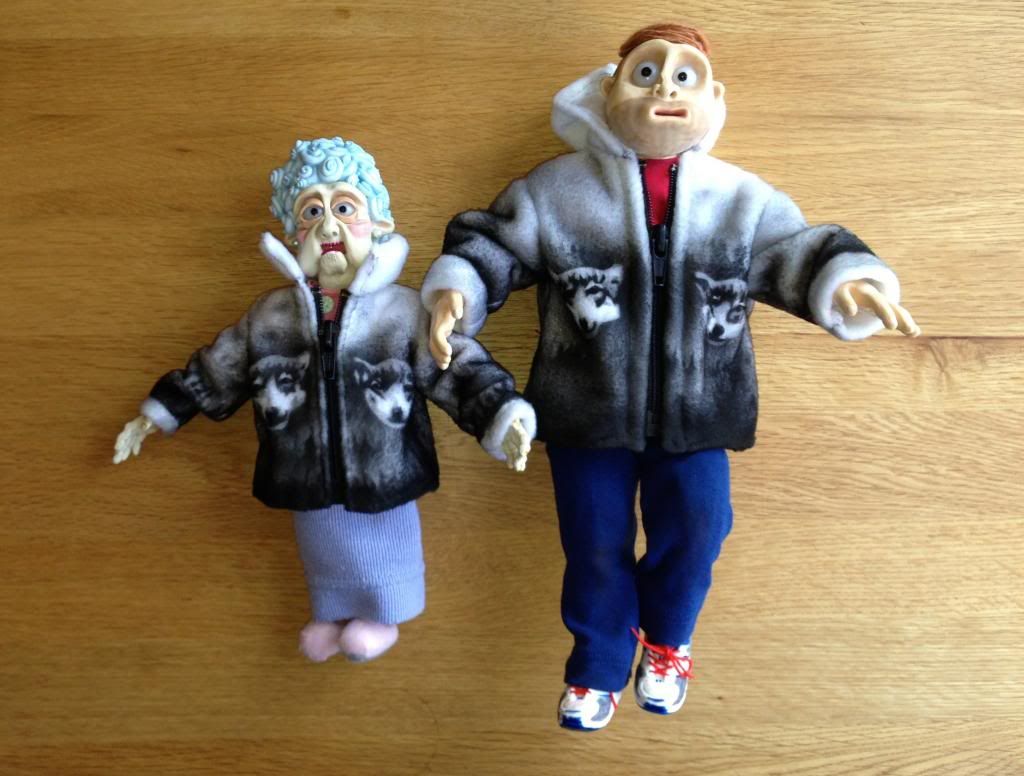
Figure 01.
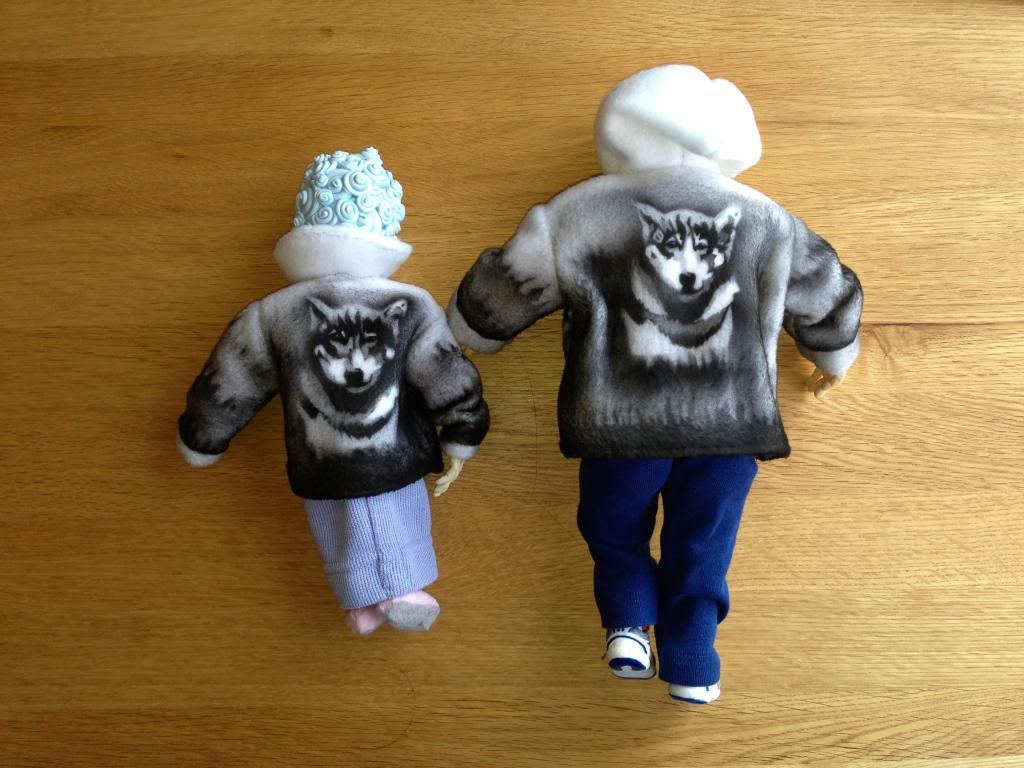
Figure 02.
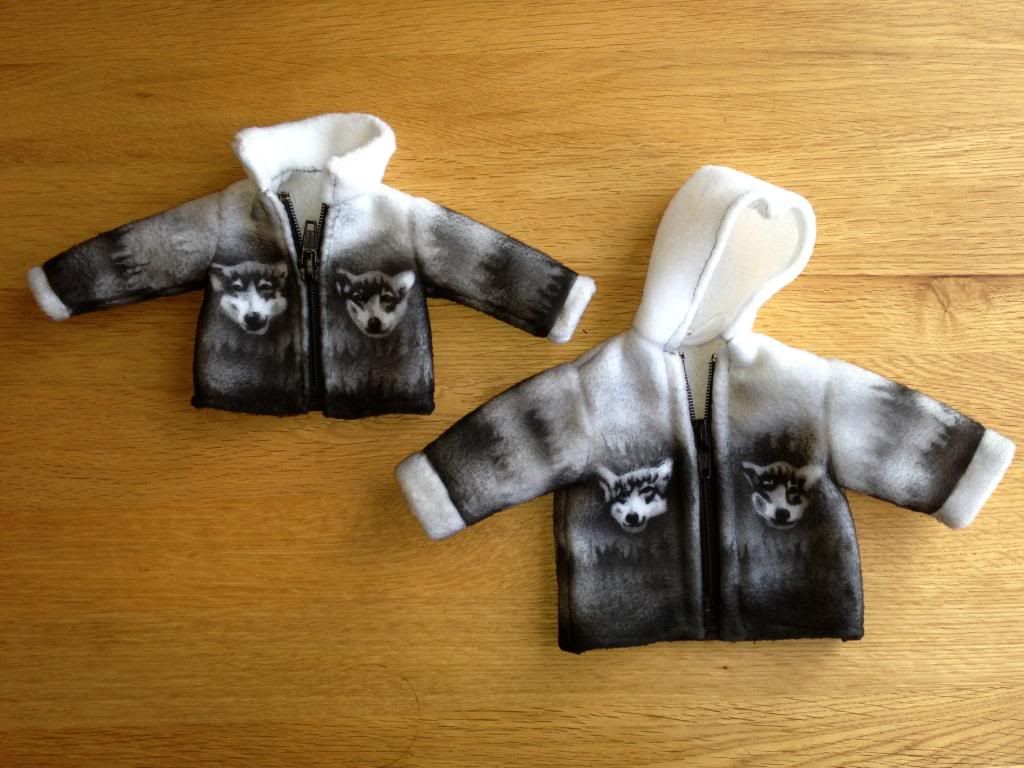
Figure 03.
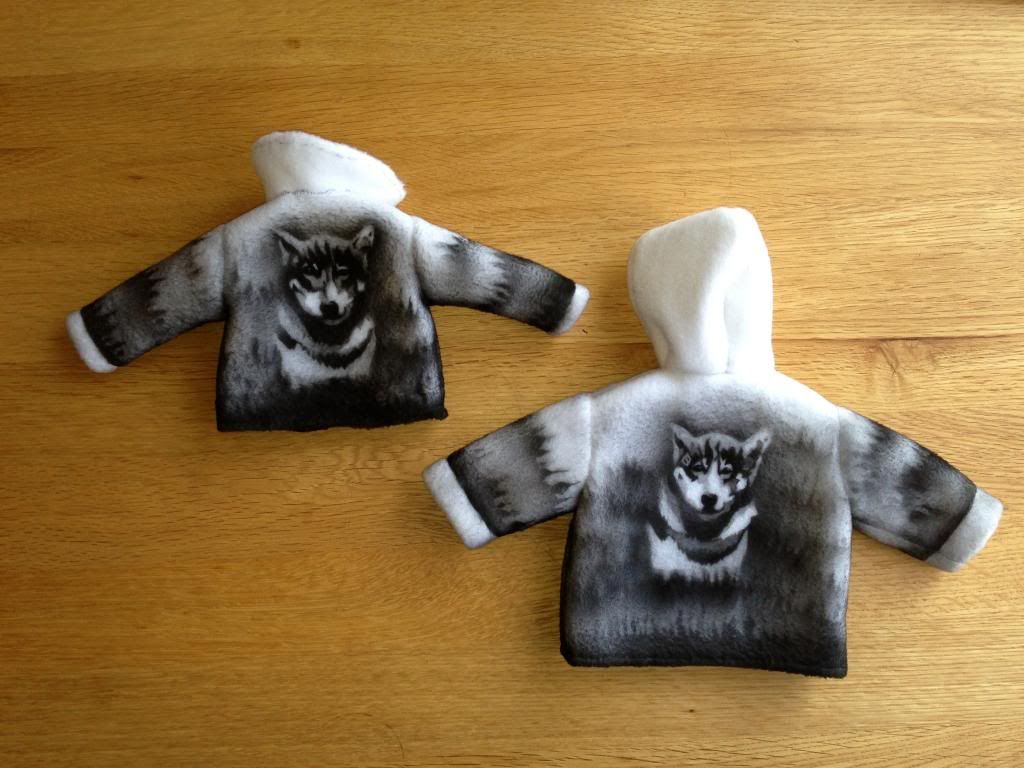
Figure 04.

Figure 05.
I made stencils cut from frog tape and applied the pieces at different times during the spray to create some grey scale.
I'll upload a 'making of' document for this soon.
Monday, 14 April 2014
Mother's Days : Car Segment 02 with Temp Sound
Clip 01. Car Sequence 02 with temporary sound
Clip 02. Both Scenes with temporary sound to show an opening sequence
Clip 03. Car Scene 02, without sound.
Clip 04. These are the Original series of jpeg images to show where the clip started from
On playback I've spotted myself getting in the way of the camera a few times, this isn't an issue as the frames are later cropped.

Image 01. Animating frame by frame a Maya Fluid Dynamics Emitter inside of a 2D container.
This ensured very accurate tracking of the cigarette end. The character's footage was displayed using a series of 824 exported jpegs then textured onto a plane within the camera view as a jpeg texture sequence.

Image 02. Once I'd tracked the cigarette end, I turned off the character layer so that the smoke would play back a lot faster which made it easier to edit in moments where wind entered the atmosphere. I key framed the changes in the smoke's settings to suit the environment inside the car. For example, light smoke to start with, then it gets denser as a comical element to start filling the car, then when she opens the window the smoke has a lot more dispersion, velocity and turbulence.
Clip 05. This is how the smoke looks on it's own layer.

Image 03. After the smoke was how I wanted it, the end of the cigarette needed to look like it was burning. First of all I tried tracking the motion in after effects, however, this process didn't work as the tracker completely lost the cigarette and made it's own little path in the opposite direction.

Image 04. To track the cigarette end, I key framed the burning end into the animation with each of the individual 824 frames, this ensured an accurate track.
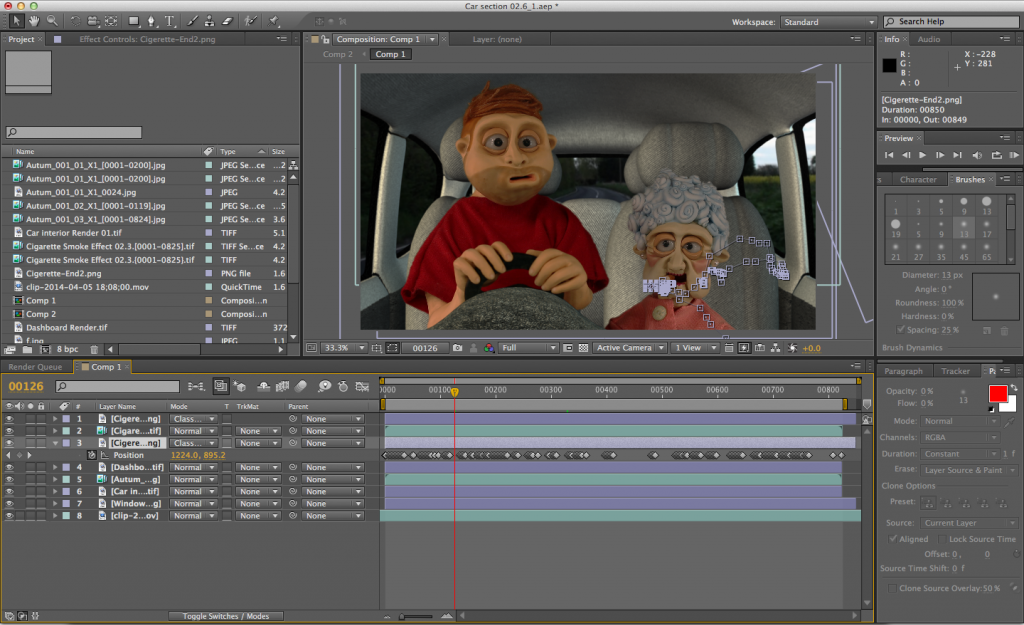
Image 05. Demonstrating the movement of the cigarette end with all of the key points.
Clip 06. This clip shows the movement of the burning cigarette end, once it was tracked I changed the setting mode to 'original colour burn' and animated the opacity throughout the animation to represent moments where Doris inhales.
Saturday, 5 April 2014
Subscribe to:
Posts (Atom)